How to Create an Invoice: Step-by-Step Guide (2026)
To create an invoice, you need to add your business details, your client's details, a unique invoice number, the invoice and due dates, an itemized list of what you're billing for, the subtotal, tax, and total amount due, and your payment terms. The fastest way to do it is with a free invoice generator—fill in the fields, preview, and download a PDF in under five minutes. This guide walks through every step in 2026, what each invoice must include, and the best tools for the job.
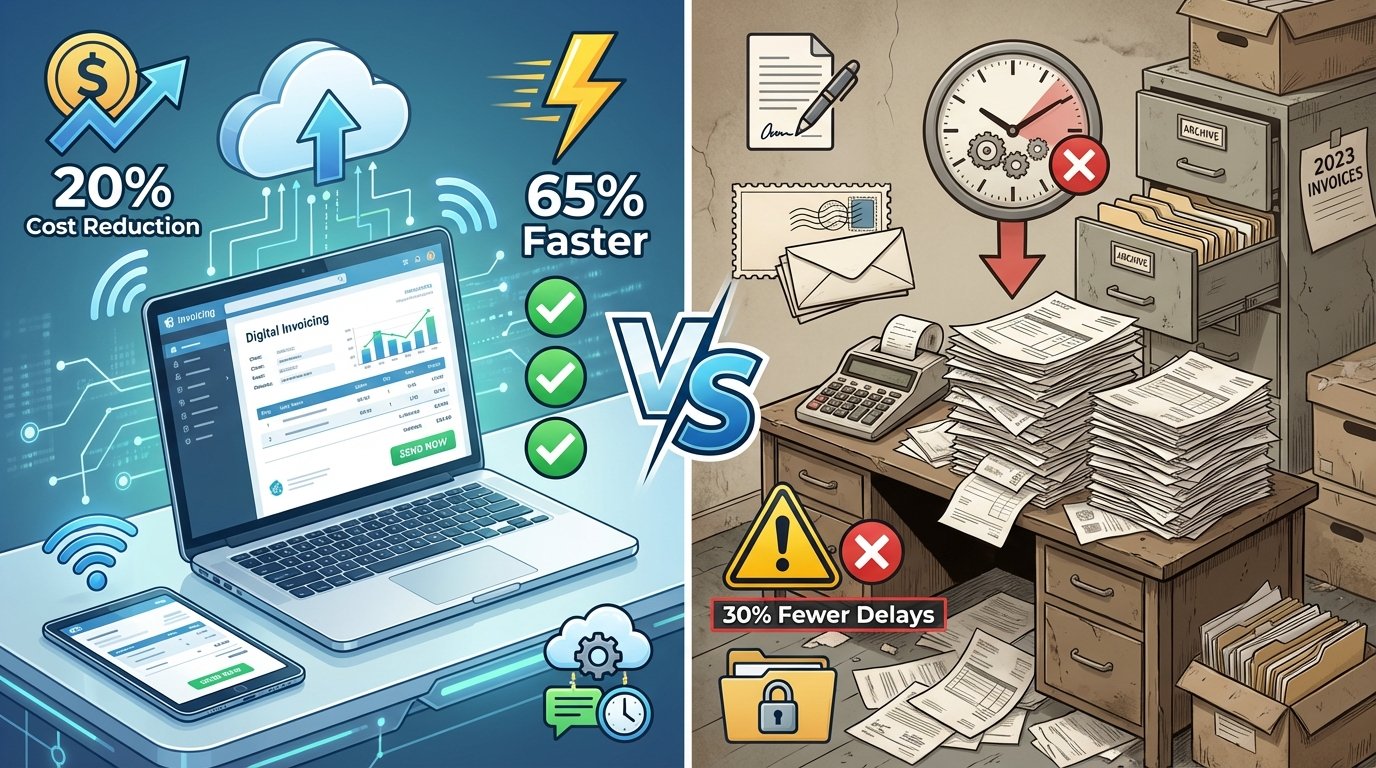
Small businesses in the United States are grappling with $825 billion in unpaid invoices, and unclear or incomplete invoices are a major culprit. If you're still creating invoices manually or sending documents that lack essential information, you're leaving money on the table.
Whether you're a freelancer sending your first invoice or a growing business scaling your operations, this guide covers everything you need to create professional, compliant invoices that get you paid faster.
In a hurry? Skip the manual work and create an invoice for free with PineBill's invoice generator—no signup required.
What Is an Invoice?
An invoice is a document a seller sends to a buyer to request payment for goods or services. It's more than a payment request—it's a legal document, a historical record of a sale, and a core part of your financial workflow. Every invoice answers three questions for your client: who is billing them, what they're paying for, and how and when to pay.
A well-made invoice in 2026 combines three things:
- Completeness — contains all legally required information for your jurisdiction, eliminating questions or disputes.
- Clarity — each component is simple and easy to understand, since ambiguity leads to payment delays.
- Consistency — uses standardized formatting and sequential numbering that streamlines your accounting and builds brand recognition.
With a digital invoicing platform like PineBill, you can automate invoice creation, reduce processing times, and produce consistent, professional invoices every time—improvements that directly impact your cash flow.
How to Create an Invoice Step by Step
Creating an invoice doesn't have to be complicated. Follow this systematic approach—each step maps directly to a section of the finished document.
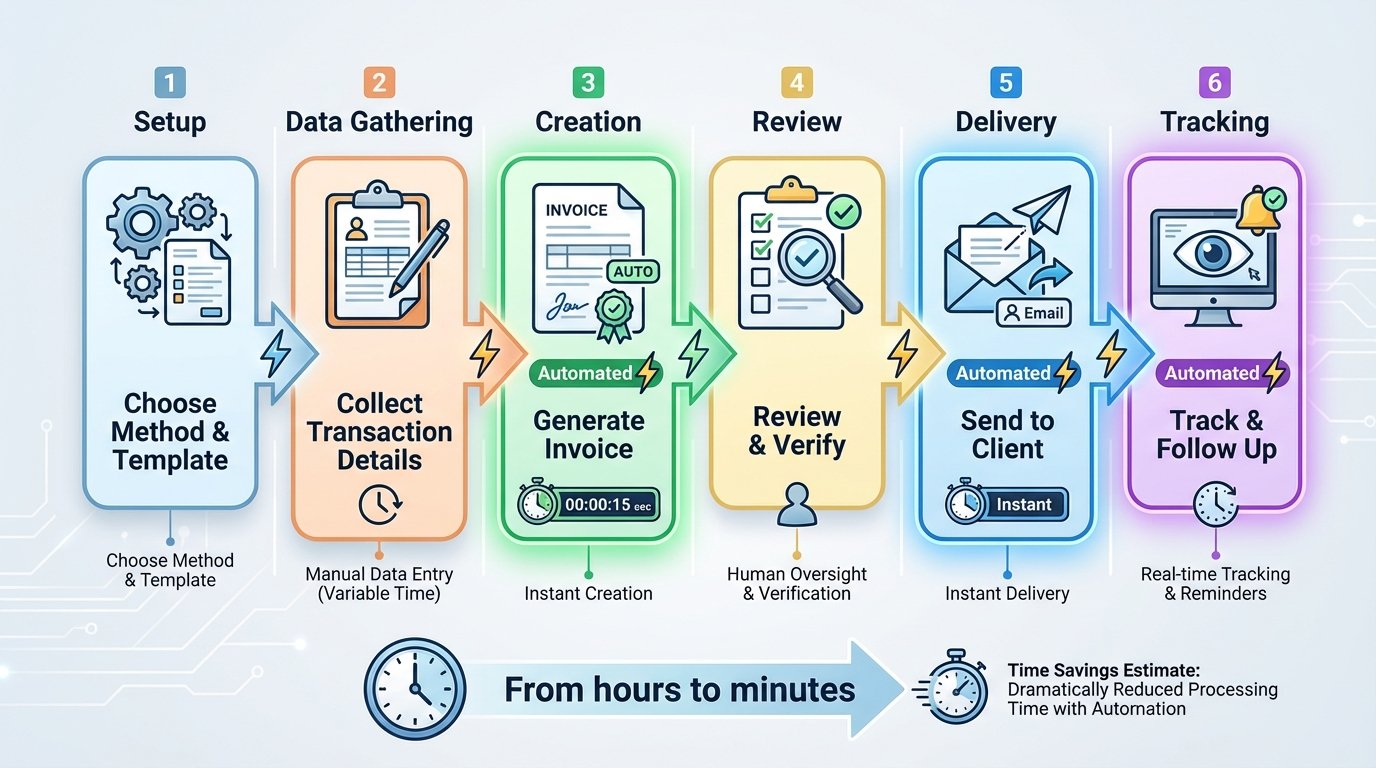
Choose Your Invoicing Method
Decide how you'll build the invoice before you start. Your options range from manual templates to fully automated software:
- Free invoice generator (fastest) — fill in a form online and download a PDF. Try PineBill's free generator.
- Word, Excel, or Google Docs/Sheets — flexible but slow, with manual calculations that invite errors.
- Invoicing software — automated numbering, tax math, reminders, and tracking for businesses sending invoices regularly.
For anything beyond a one-off, automation is the key to optimizing your invoicing process in 2026.
Add Your Business Information
Include your company name, business address, contact details (phone or email), and your logo. Depending on your jurisdiction, you may also need:
- Tax Identification Number (TIN) or Employer Identification Number (EIN)
- Business registration number
- VAT number (for EU businesses)
- A professional email address or website
Adding your logo enhances professionalism and brand recognition.
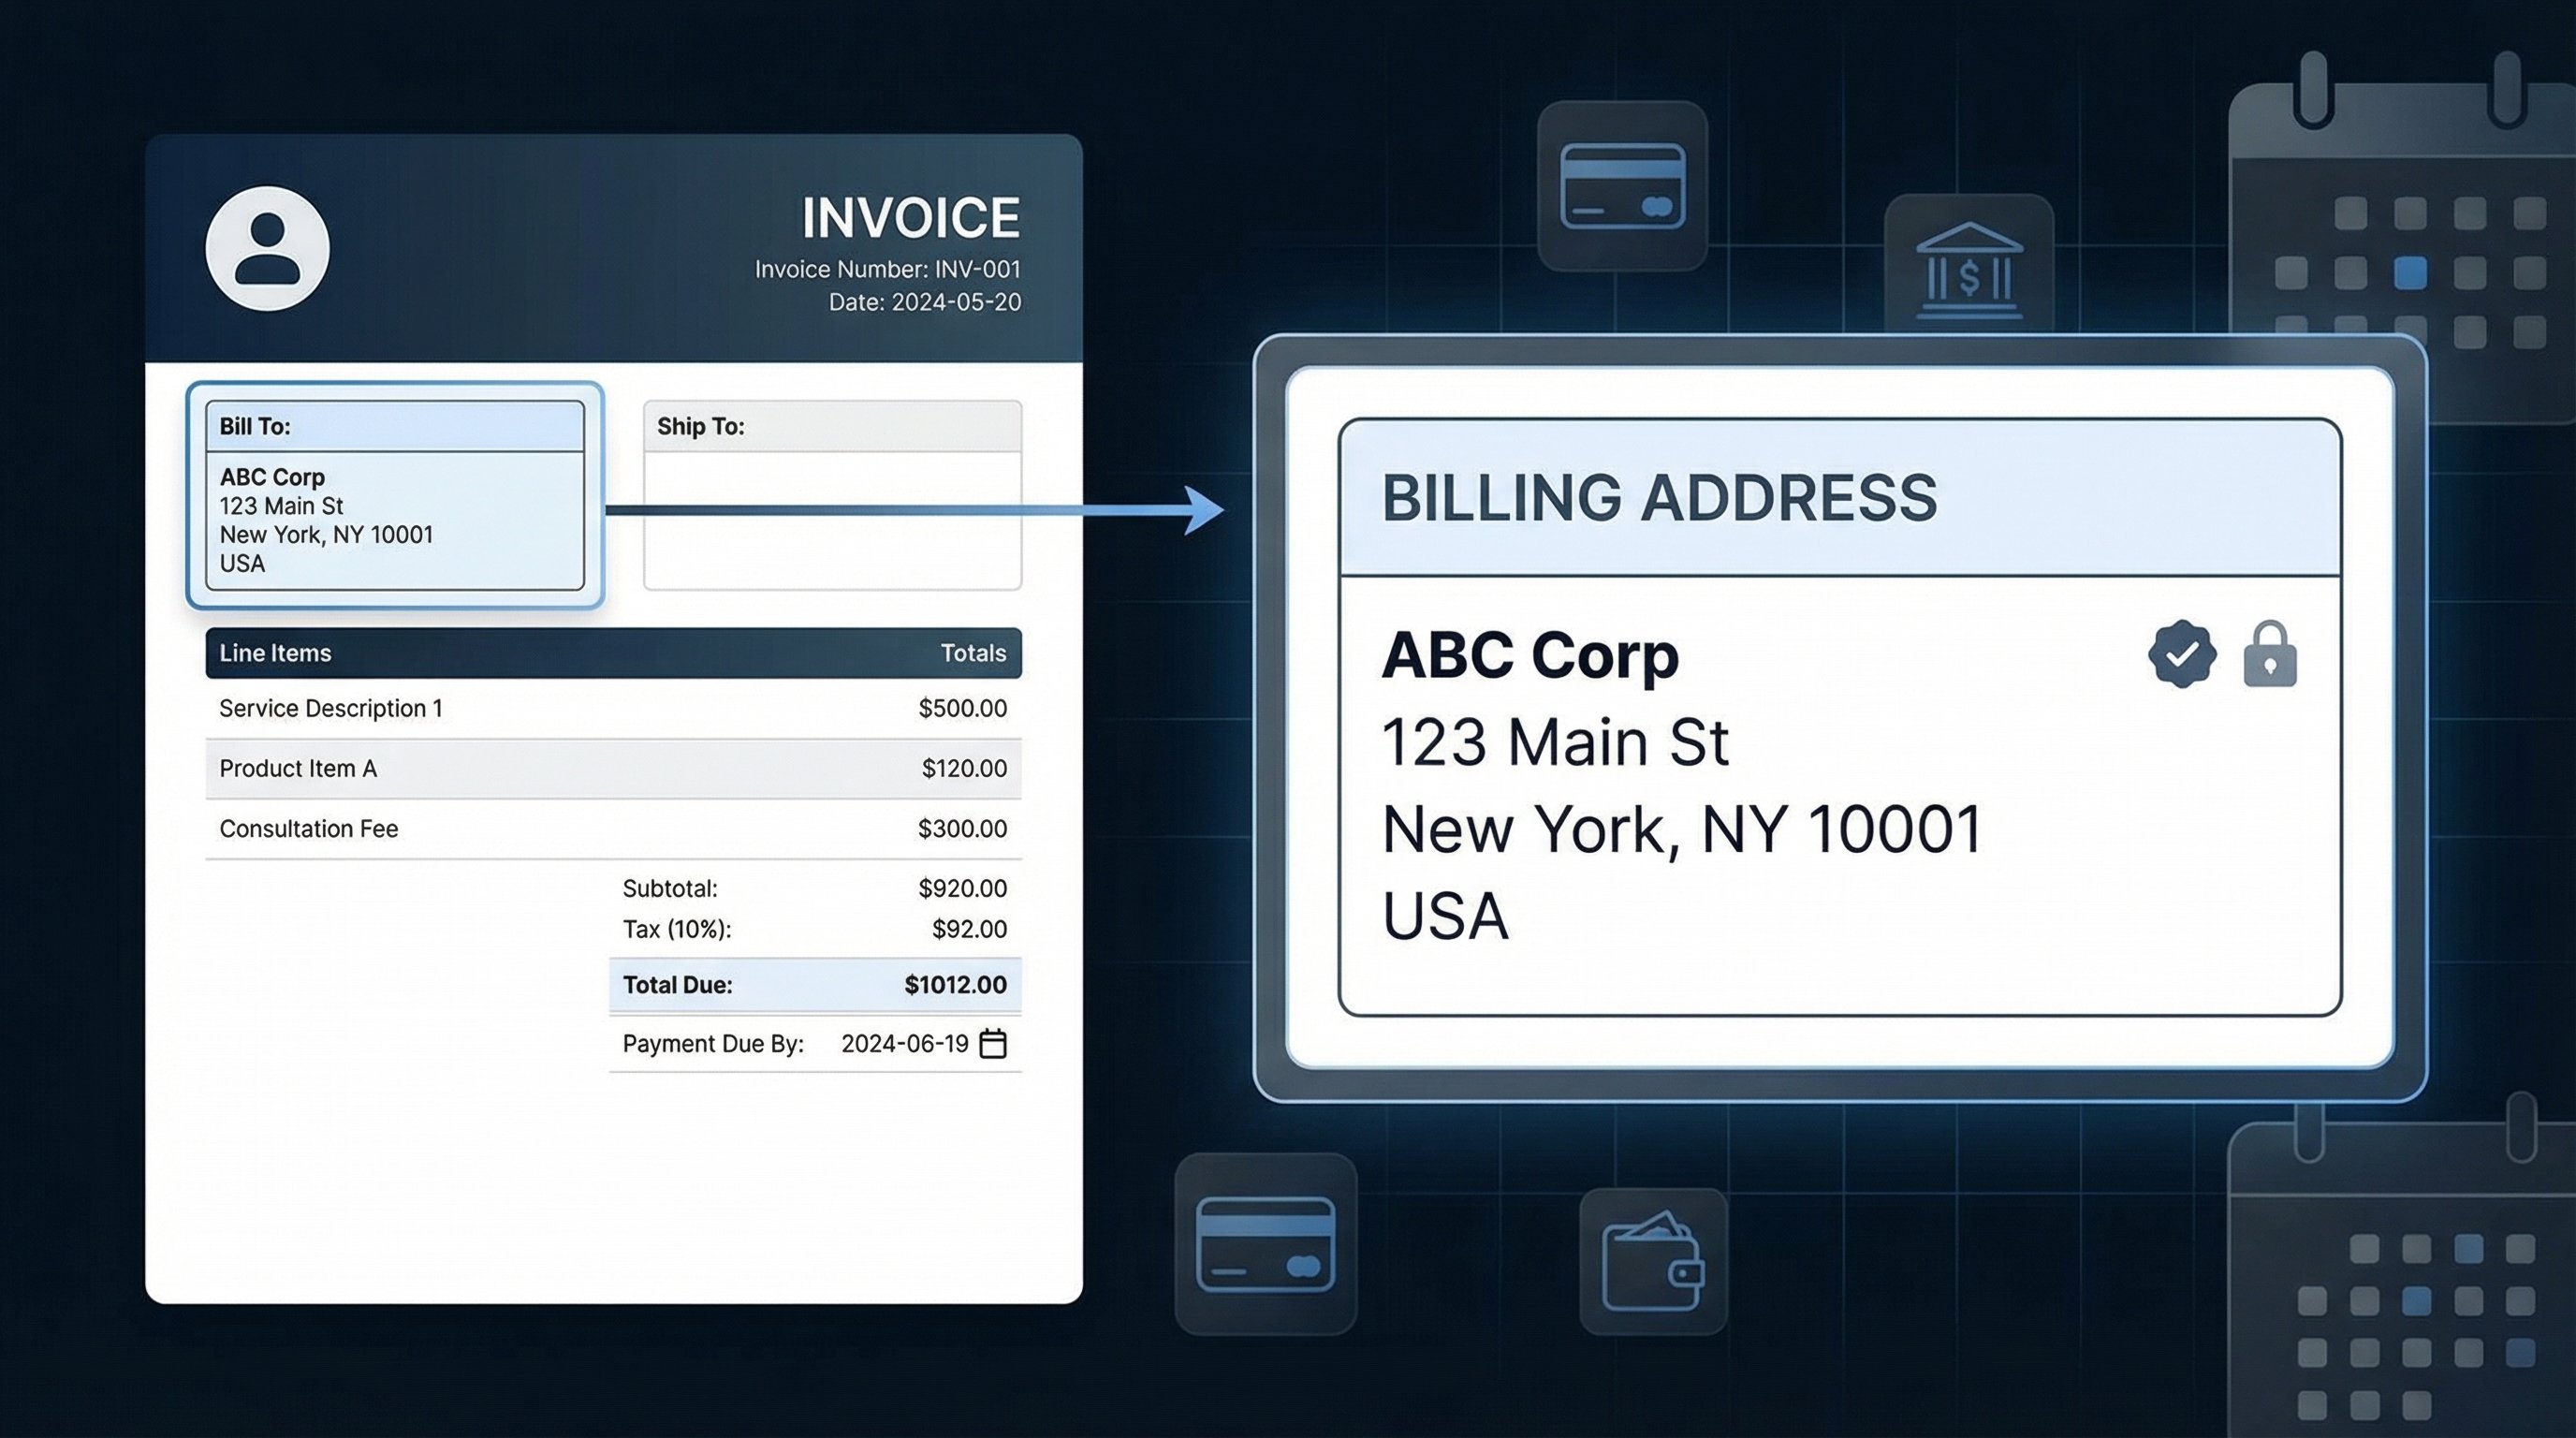
Add Your Client's Details
Include the name, address, and contact details of the client or business you're billing. Best practice is to address the invoice to a specific person, not just the company—double-check who should receive it.
For B2B transactions, include the client's company name, billing contact, and any purchase order (PO) number they provided.
Assign a Unique Invoice Number
In the US there's no mandated format, but invoice numbers should be sequential with no gaps for clean accounting. Common formats include:
- 2026-001 — year plus sequential number
- INV/2026/01/017 — document type, year, month, and number within that month
- CLIENT-2026-001 — client identifier plus year and number
Pick a system that scales with your volume and stick with it.
Add the Invoice Date and Due Date
Include both the date you issue the invoice and the date payment is due. A specific calendar date ("Due July 7, 2026") is more effective than vague terms like "Net 30." Most small businesses ask to be paid within 7–30 days.
List Each Product or Service With Pricing
Break out every line item so there's no ambiguity. For each, include:
- A clear description of the product or service
- Quantity or hours
- Unit price or hourly rate
- Line total
Avoid vague descriptions like "consulting services." Use specifics: "Website redesign consultation — 8 hours @ $150/hour."
Calculate Subtotals, Taxes, and Total
Show the math clearly, top to bottom:
- Subtotal — sum of all line items before tax
- Discounts — any early-pay incentives or deductions, as separate lines
- Tax — applicable sales tax, VAT, or GST with the rate shown
- Total Amount Due — the final figure, in large, bold text
A tool like PineBill handles these calculations automatically so you never send a math error.
Specify Payment Terms and Methods
Tell the client exactly how and when to pay:
- Accepted payment methods (bank transfer, credit card, PayPal, ACH)
- Bank details or a payment portal link
- Currency (especially for international clients)
- Early payment discounts, if offered
- Late payment fees, if applicable (typically 1.5%–5% per month where state law permits)
Review and Send the Invoice
Double-check the math, client name, invoice number, and due date, then send promptly. Email a PDF—it preserves formatting across devices—and put the invoice number, total due, and due date in the subject line. Send immediately upon completing the work to keep cash flowing.
With PineBill you can also generate a shareable link with password protection, track when the client views it, and trigger automatic reminders.
10 Essential Elements Every Invoice Must Include
Regardless of your business type or location, every professional invoice should contain the following. Use this as a pre-send checklist.
- The word "Invoice" as a clear header — distinguishes it from a quote or receipt.
- Your business information — name, address, contact details, logo, and tax IDs.
- Client information — the billing contact's name, address, and details.
- A unique invoice number — sequential, no gaps.
- Invoice date and due date — when it was issued and when payment is due.
- A detailed description of each product or service.
- Subtotal, taxes, and total amount due — broken down clearly.
- Payment terms and accepted methods — how and when to pay.
- Additional notes or terms — thank-you message, references, or warranty info (keep it brief).
- Contact information for billing questions — make it easy to reach you.
Ways to Create an Invoice (Compared)
There's no single "right" tool—it depends on your volume and how much you value automation. Here's how the common methods stack up.
| Method | Best for | Speed | Auto calculations | Tracking & reminders | Cost |
|---|---|---|---|---|---|
| Free invoice generator | One-off invoices, freelancers starting out | Fast | Yes | No | Free |
| Word / Google Docs | Occasional, fully custom layouts | Slow | No | No | Free |
| Excel / Google Sheets | People who want built-in formulas | Medium | Partial | No | Free |
| Payment processor (Square, PayPal, Stripe) | Those already collecting payments there | Medium | Yes | Limited | Per-transaction fees |
| Invoicing software (PineBill) | Recurring invoicing, growing businesses | Fast | Yes | Yes | Free–paid tiers |
How to Create an Invoice for Free With PineBill
You don't need accounting software or design skills to send a polished invoice. PineBill's free invoice generator lets you create and download a professional invoice in minutes—no signup required:
- Open the invoice generator.
- Enter your business and client details.
- Add line items, quantities, and rates—PineBill calculates subtotals, tax, and totals automatically.
- Pick a template and preview your invoice in real time.
- Download the PDF and send it to your client.
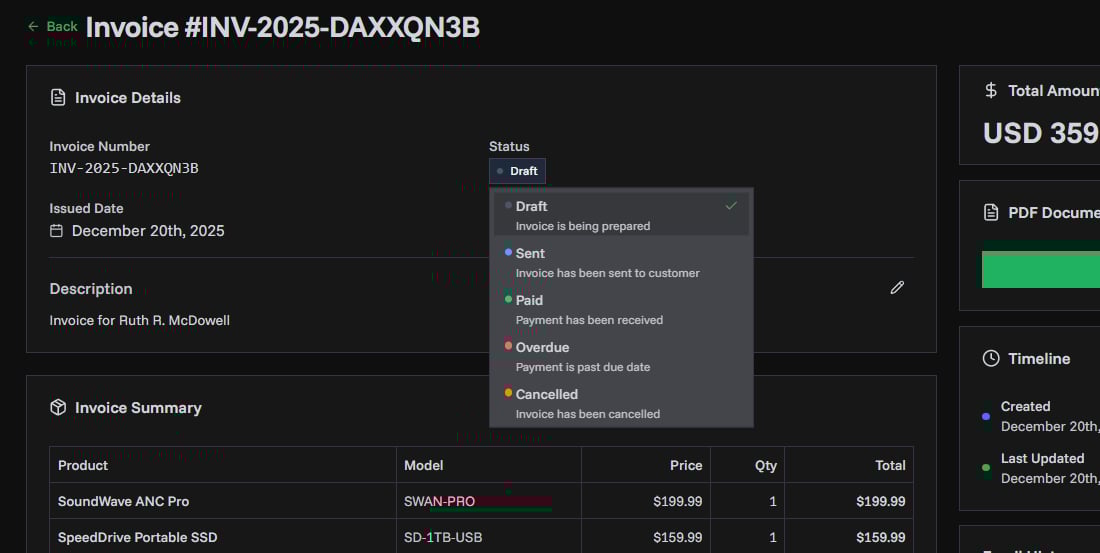
When you're ready to scale, a free PineBill account adds saved customers and products, sequential numbering, status tracking (Draft, Sent, Paid, Overdue), shareable links, multiple currencies, and analytics.
Related Invoicing Guides
Deepen your invoicing know-how with these guides:
- Quote vs. Invoice: What's the Difference and When to Use Each
- Invoice Payment Terms: 8 Ready-to-Use Templates
- Best Practices for Freelancer Invoicing: Get Paid Faster
- Recurring Invoices: The Complete Guide to Automating Billing
- What Is a PO Number? A Complete Guide for Invoicing