Editing Invoices
Learn how to edit existing invoices in PineBill.
Overview
PineBill allows you to edit invoices to correct errors, update information, or adjust details after creation. There are two ways to edit invoices: full editing through the invoice generator, or quick inline edits directly on the invoice details page.
Editing Restrictions
Not all invoices can be edited. The table below shows which statuses allow editing:
| Status | Can Edit | Notes |
|---|---|---|
| DRAFT | Yes | Full editing available |
| SENT | Yes | Consider notifying the customer of changes |
| OVERDUE | Yes | You may also want to update the status |
| PAID | Yes | Limited - mainly for corrections |
| CANCELLED | No | Cannot edit cancelled invoices |
While paid invoices can be edited, it's generally recommended to only make corrections to maintain accurate records. For significant changes, consider creating a new invoice instead.
Full Invoice Editing
For comprehensive changes to an invoice, use the full editing mode which opens the invoice generator with all data pre-filled.
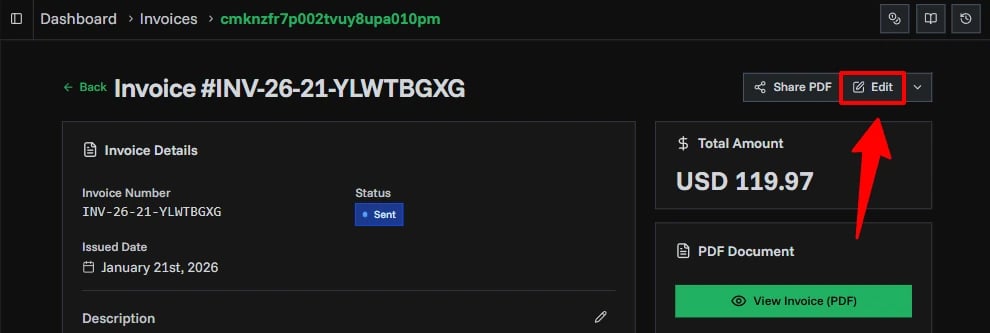
How to Access Full Edit Mode
- Navigate to the invoice details page by clicking any invoice from the invoices list
- Click the Edit button in the page header
- The invoice generator opens with all existing data pre-filled
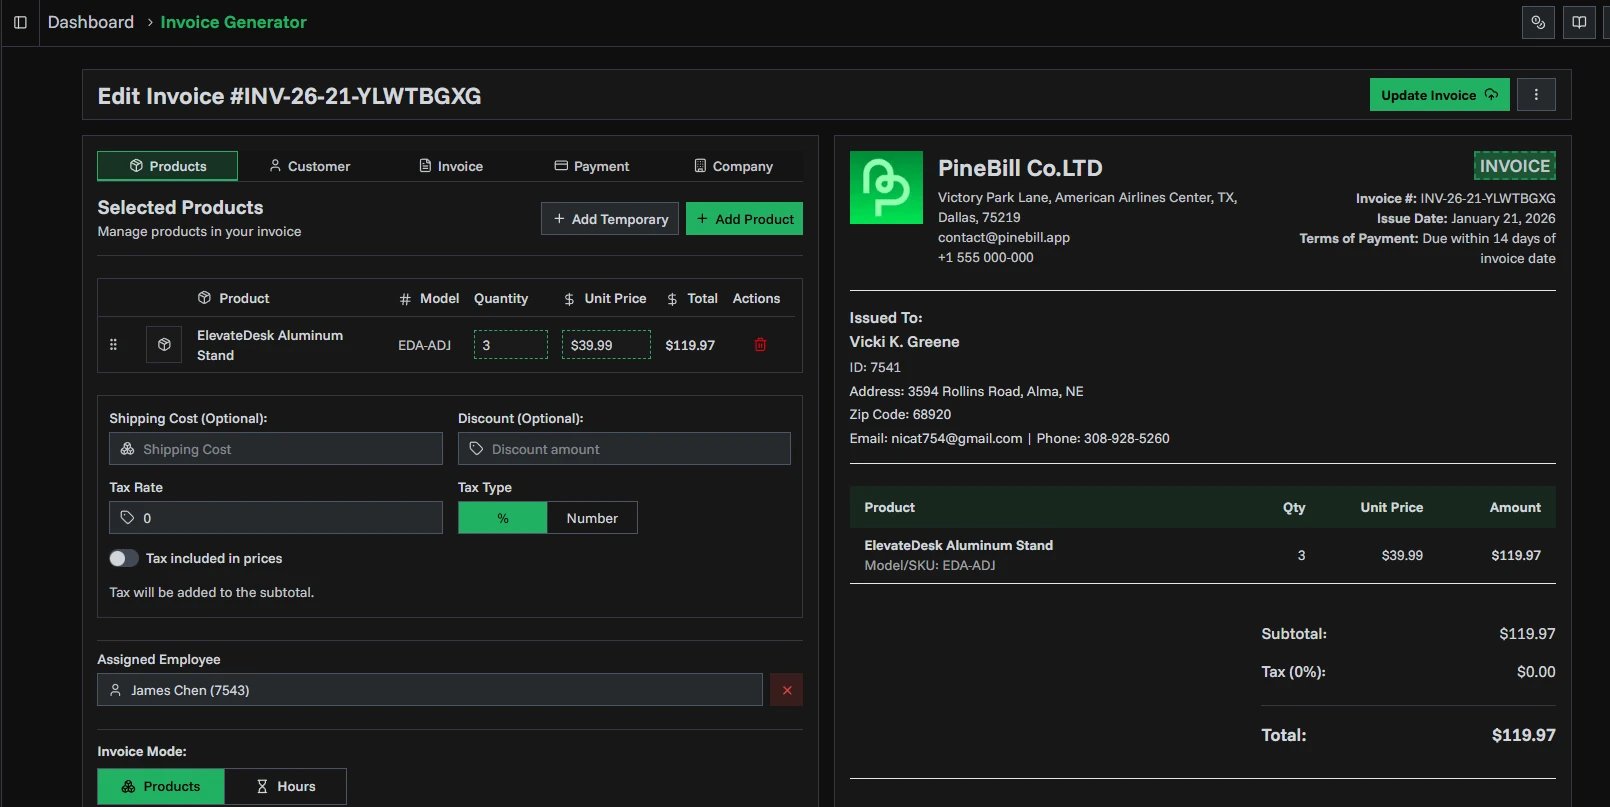
Editing in the Generator
The invoice generator in edit mode works identically to creating a new invoice, but with all fields already populated:
- Products/Services - Add, remove, or modify line items
- Customer - Change the customer (if needed)
- Invoice Details - Update dates, numbers, currency, and custom fields
- Payment Methods - Add or remove payment options
- Company Information - Adjust company details for this invoice
Saving Changes
- Make your desired changes across any of the tabs
- Click the Save Changes button (top right)
- The PDF is regenerated with the updated information
- You're redirected back to the invoice details page
Editing an invoice regenerates the PDF. If you've already shared the invoice, the shared link will show the updated version.
Quick Edits on Details Page
For minor updates, you can edit certain fields directly on the invoice details page without opening the full generator.
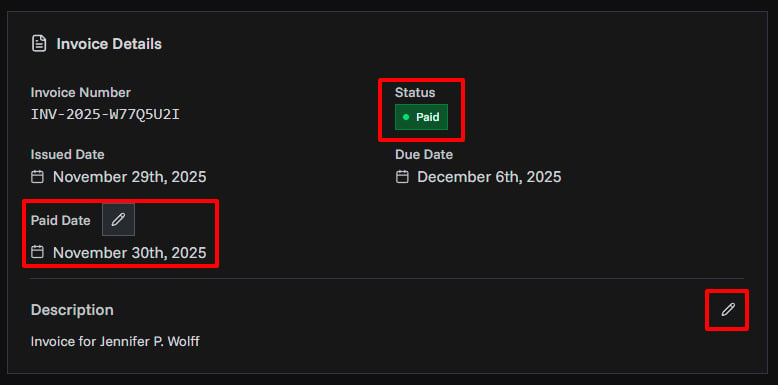
Editable Fields
| Field | How to Edit | Notes |
|---|---|---|
| Status | Click the status badge to open dropdown menu | Changes saved immediately |
| Description | Click the pencil icon next to description | Opens text editor, save or cancel changes |
| Paid Date | Click the pencil icon next to paid date | Opens date picker, must be after issue date |
Status Updates
Click the status badge to instantly change the invoice status:
- Click on the current status (e.g., "DRAFT")
- Select the new status from the dropdown
- Change is saved immediately
Available statuses: Draft, Sent, Paid, Overdue, Cancelled
Description Editing
- Click the pencil icon next to the description field
- Type or modify the description text
- Click Save to apply changes or Cancel to discard
Paid Date
- Click the pencil icon next to the paid date
- Select a date from the date picker
- The date must be on or after the invoice issue date
- Changes save automatically when you select a date
Employee Assignment
You can assign or change the employee responsible for an invoice directly from the details page.
Assigning an Employee
- Scroll to the "Assigned Employee" section
- Click Assign Employee
- Select a team member from the dropdown
- Assignment is saved immediately
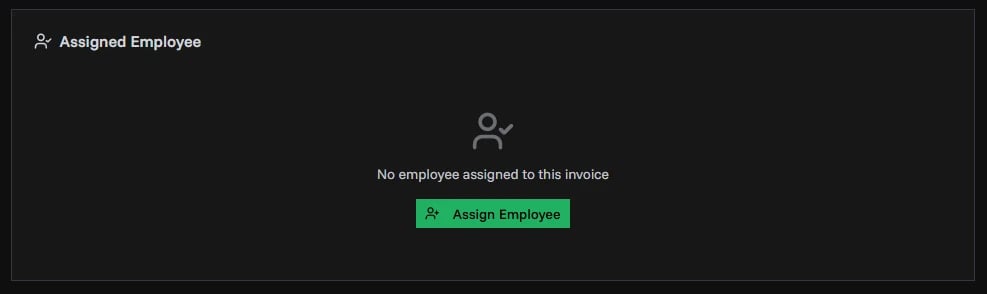
Changing or Removing Assignment
- Click Change to select a different employee
- Click Unassign to remove the current assignment
Employee assignments help track performance metrics and sales attribution.
Related Topics
- Invoice Details Page - View and manage invoice information
- Invoice Statuses - Understanding the invoice lifecycle
- Creating Invoices - Step-by-step invoice creation guide