Creating Recurring Invoices
Step-by-step guide to setting up automated billing schedules in PineBill.
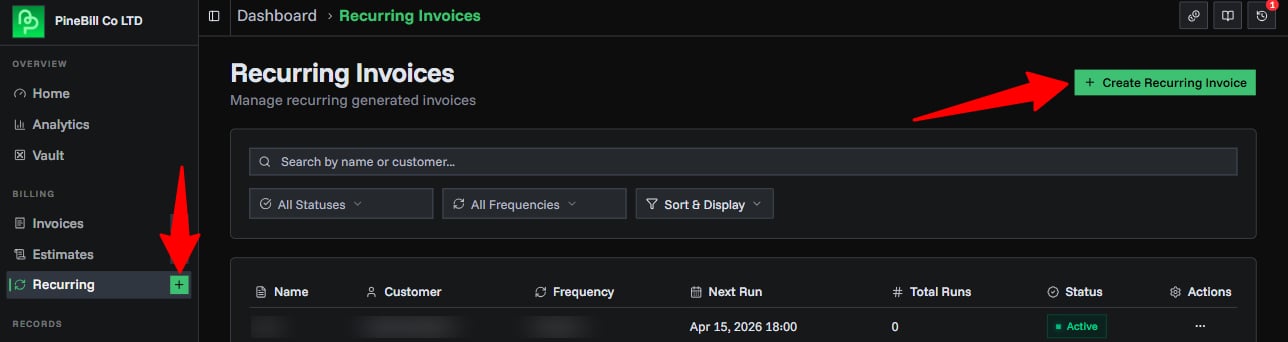
Quick Start
Navigate to Recurring Invoices → Create from the sidebar, or click "New Recurring Invoice" from the recurring invoices list page.
The generator has a tabbed form on the left and a live summary sidebar on the right. Fill out the five tabs to configure your recurring invoice.
Tab 1: Schedule
The Schedule tab defines when and how often invoices are generated.
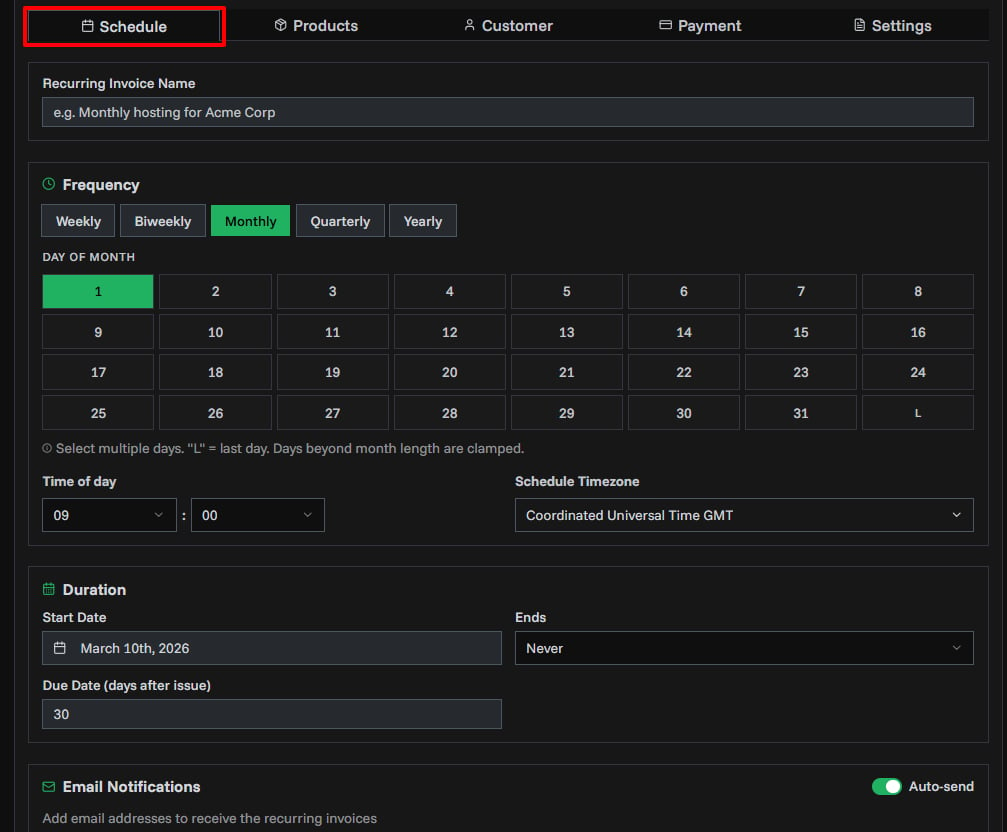
Name
Give your recurring invoice a descriptive name (e.g., "Monthly hosting for Acme Corp"). This label appears in the list view and notifications.
Frequency
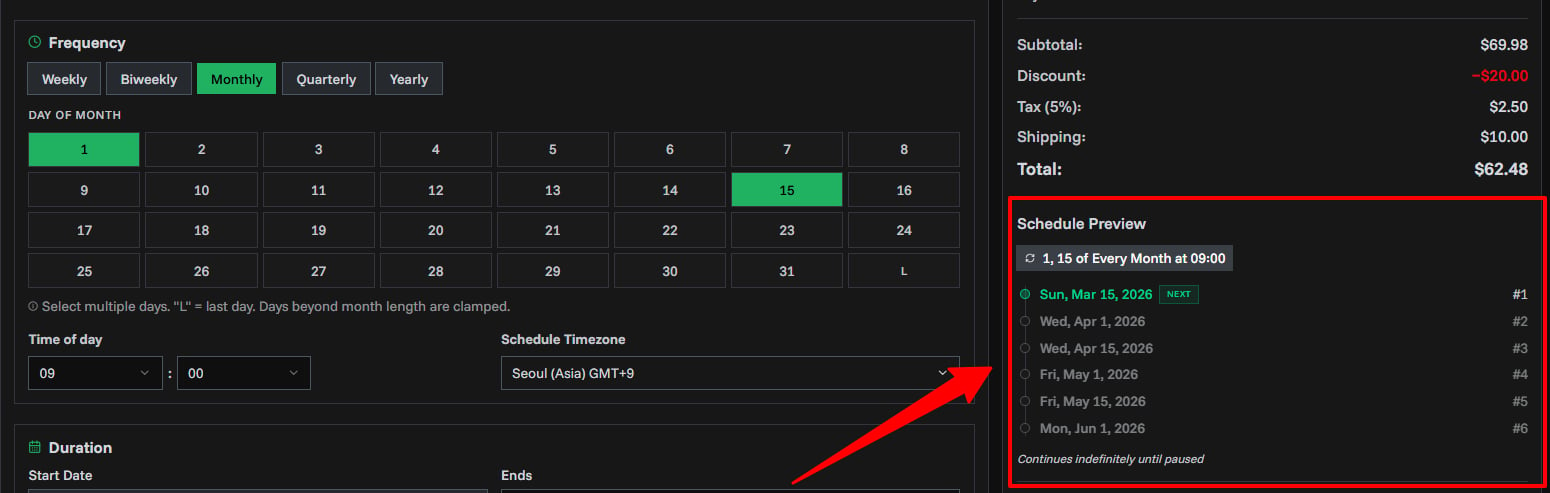
Select how often invoices should be generated:
| Frequency | Description | Anchor Type |
|---|---|---|
| Weekly | Every week | Day of week (Sun–Sat) |
| Biweekly | Every two weeks | Day of week (Sun–Sat) |
| Monthly | Every month | Day of month (1–31, or last day) |
| Quarterly | Every three months | Day of month (1–31, or last day) |
| Yearly | Once a year | Day of month (1–31, or last day) |
Anchor Days
After selecting a frequency, choose which days invoices should be generated:
- Weekly / Biweekly: Select one or more days of the week (Sunday through Saturday). An invoice is generated for each selected day per cycle.
- Monthly / Quarterly / Yearly: Select one or more days of the month (1–31). Use the L button to select the last day of the month. An invoice is generated for each selected day per cycle.
You can select multiple anchor days. For example, selecting the 1st and 15th for a monthly schedule generates two invoices per month.
Time
Set the hour (00–23) and minute (00, 15, 30, or 45) when invoices should be generated.
Default: 09:00
Timezone
Select the timezone for the schedule. When a customer is selected on the Customer tab, the timezone auto-populates from the customer's timezone setting.
Default: Your organization's timezone (falls back to UTC).
Make sure the timezone is set correctly — it determines the exact time invoices are generated. An incorrect timezone can cause invoices to be created hours earlier or later than expected.
Schedule Preview
As you configure the schedule, the summary sidebar shows a human-readable preview (e.g., "1st and 15th of Every Month at 09:00") along with the next 6 scheduled run dates. This helps you verify that the schedule matches your intentions before creating the recurring invoice.
Duration
Control how long the recurring invoice runs:
| End Type | Description |
|---|---|
| Never | Runs indefinitely until manually paused or cancelled |
| End Date | Stops after a specific date |
| Count | Stops after generating a set number of invoices (1–999) |
- Start Date: When the schedule begins (defaults to today).
- Due Date Days: Number of days after the issue date for the payment due date (e.g., 30 for Net 30).
Email Notifications
- Auto-send: Toggle whether generated invoices are automatically emailed to recipients. Enabled by default.
- Recipient Emails: Add one or more email addresses. When a customer is selected, their email is pre-populated.
Tab 2: Products
Add the line items that will appear on each generated invoice.
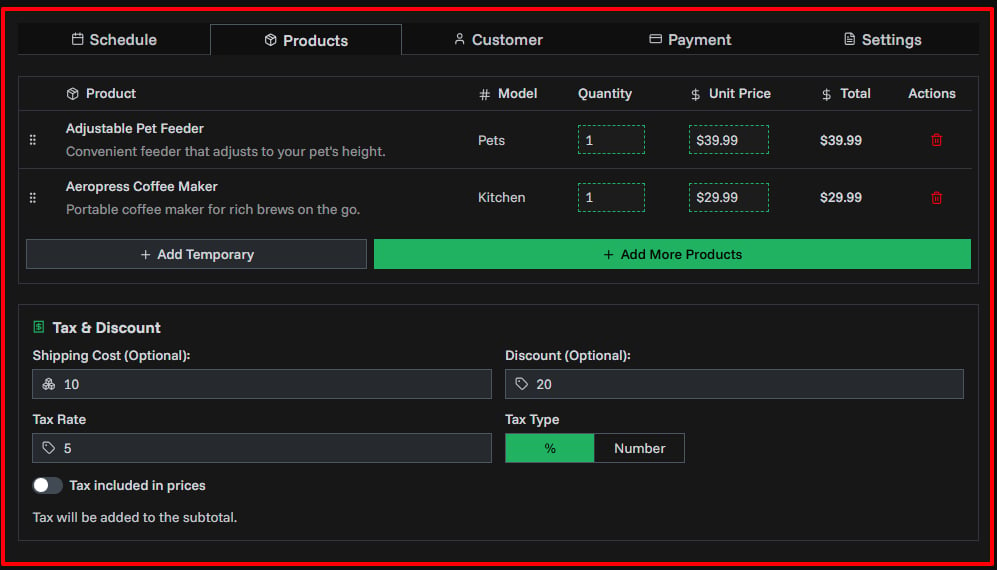
- Type to Search: Start typing a product name in the inline row at the bottom of the table. An autocomplete dropdown appears with matching products from your catalog. Recent products appear automatically when you click the field.
- Select from Catalog: Click a product in the dropdown to instantly add it with its saved details.
- Create Inline Temporary Item: Type a new product name, fill in model, quantity, and price in the same row, then press Enter or click outside to add it. Temporary items are not saved to your catalog.
- Browse All Products: Click "Browse All Products" at the bottom of the autocomplete dropdown to open the full product selector with filters and multi-select.
- Drag to Reorder: Rearrange items by dragging.
- Inline Editing: Click to edit quantity and price directly. For temporary items, name and model are also editable.
Tax & Discount
Configure these in the Products tab:
| Setting | Description |
|---|---|
| Shipping Cost | Fixed shipping amount added to each invoice |
| Discount | Fixed discount amount subtracted from subtotal |
| Tax Rate | Tax percentage or fixed amount |
| Tax Type | Percentage (%) or Fixed amount |
| Tax Included | Toggle whether item prices already include tax |
Tab 3: Customer
Select the customer who will receive the recurring invoices.
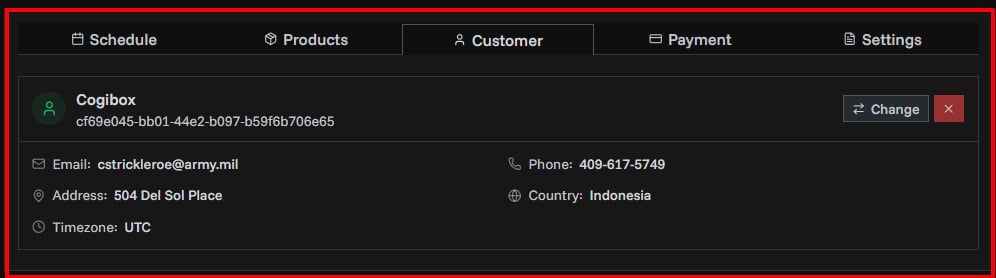
Click "Select Customer" to browse or search your customer list. Selecting a customer automatically:
- Sets the schedule timezone to the customer's timezone
- Pre-populates the recipient email list with the customer's email
Tab 4: Payment
Select one or more payment methods to include on each generated invoice.
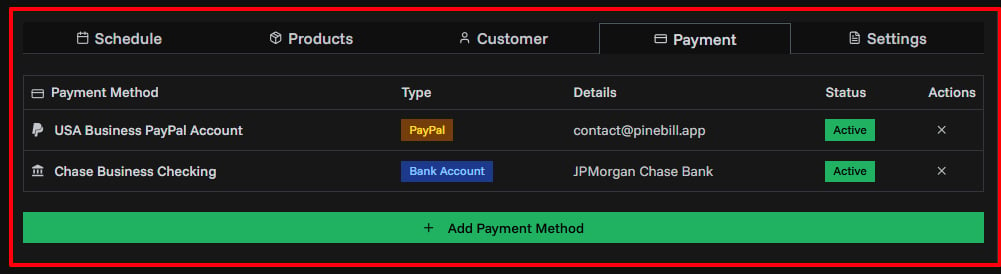
Click "Select Payment Methods" to choose from your saved payment methods (bank transfer, PayPal, cryptocurrency, or custom).
Tab 5: Settings
Configure invoice appearance and content defaults.
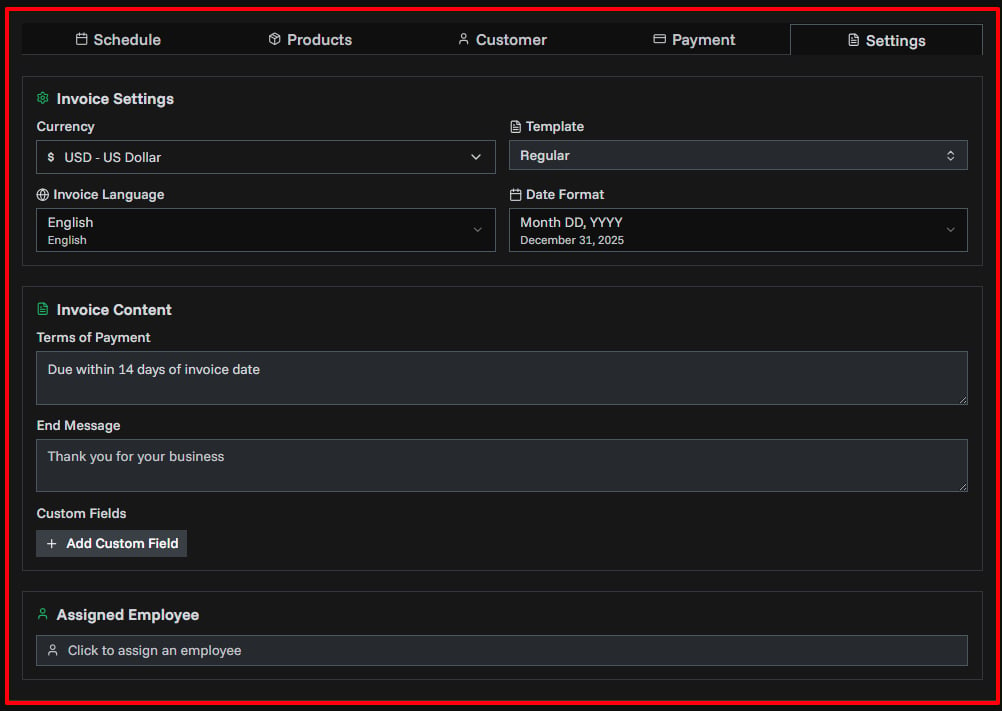
Invoice Settings
| Setting | Description | Default |
|---|---|---|
| Currency | Currency for all invoice amounts | Organization default |
| Currency Format | How currency values are displayed | Invoice settings |
| Template | PDF template style | Organization default |
| Language | Invoice label language | English |
| Date Format | How dates appear on the invoice | Month DD, YYYY |
Invoice Content
- Terms of Payment: Payment conditions text (e.g., "Net 30", "Due on receipt").
- End Message: A note or thank-you message at the bottom of each invoice.
- Custom Fields: Add label/value pairs for additional information (e.g., PO Number, Project ID).
Assigned Employee
Optionally assign the recurring invoice to an employee. This links all generated invoices to that employee for performance tracking and reporting.
Summary Sidebar
As you fill out the form, the summary sidebar shows a live preview of your configuration:
- Customer and product count
- Calculated totals (subtotal, discount, tax, shipping, total)
- Schedule Preview: A human-readable summary of the frequency (e.g., "1st of Every Month at 09:00") with the next 6 scheduled dates
Creating the Invoice
Once all required fields are filled (name, frequency, at least one anchor day, customer, and at least one product), click Create Recurring Invoice.
The recurring invoice is created with Active status and will generate its first invoice at the next scheduled time.
Related Topics
- Managing Recurring Invoices — View, filter, pause, and monitor
- Invoice Templates — Template styles for generated invoices
- Invoice Settings — Configure default invoice settings