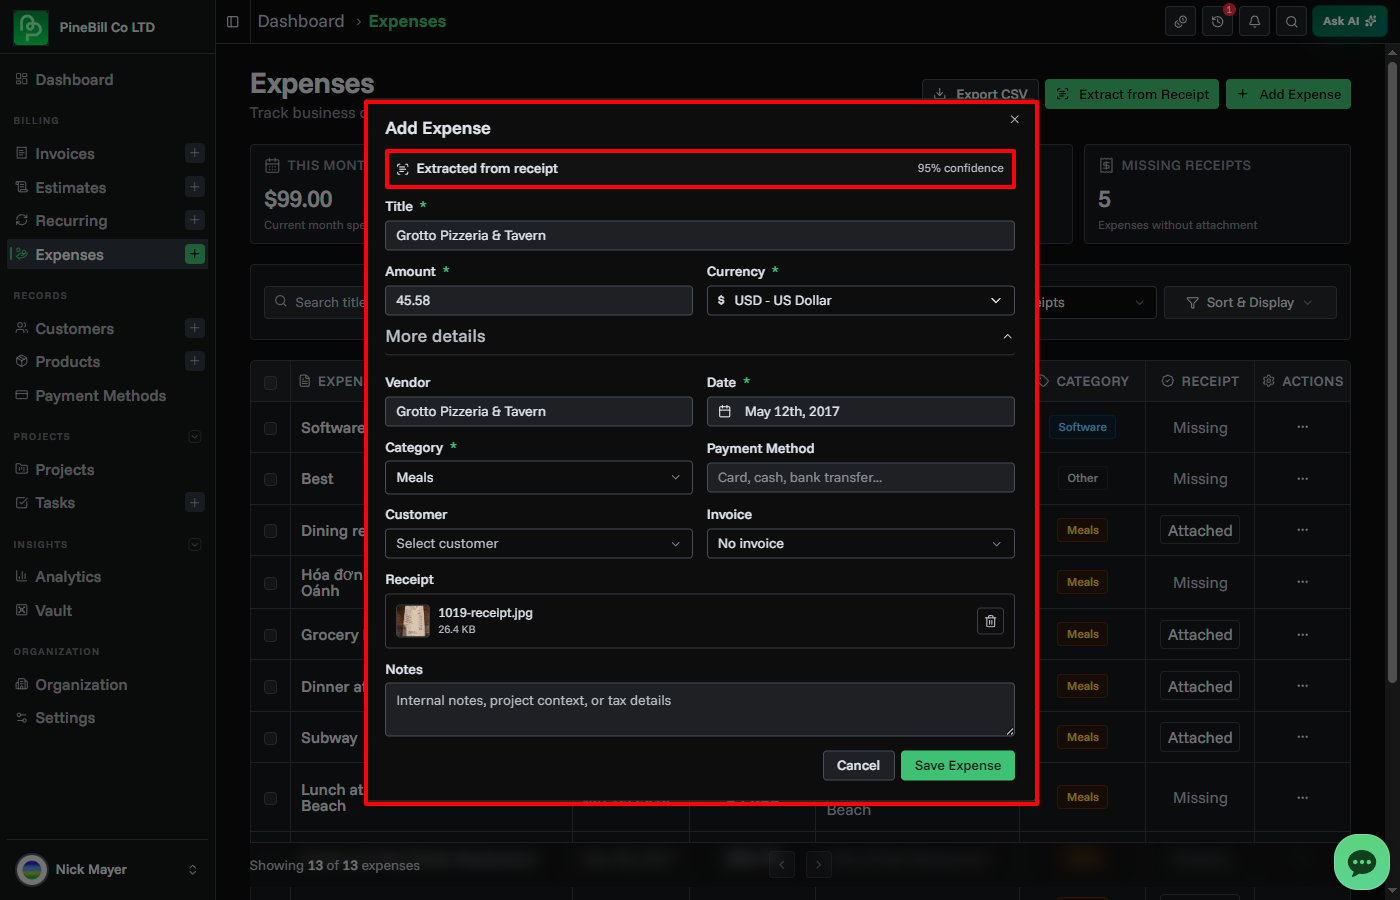
Extract from Receipt
Use AI-powered OCR to scan a receipt image or PDF and automatically fill in expense details.
Quick Start
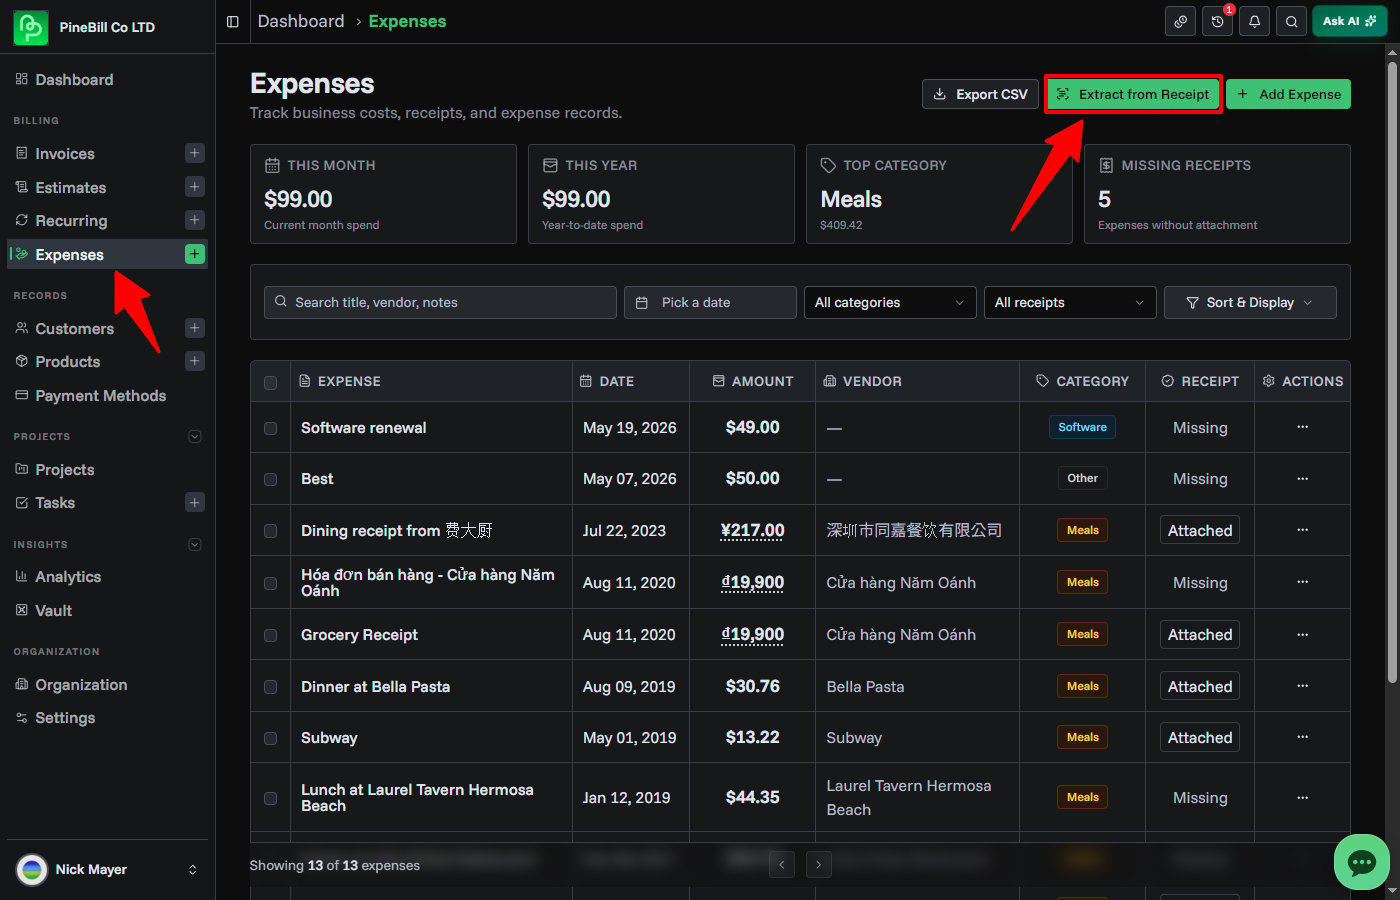
Go to Dashboard -> Expenses and click Extract from Receipt.
PineBill uses AI to read your receipt and automatically fill in the expense form with the extracted details — title, amount, currency, date, category, vendor, and payment method.
Extract from Receipt uses AI credits. Each scan costs 2.5 credits. You can check your credit balance in the AI Credits settings.
How It Works
Extract from Receipt uses an AI vision model to read uploaded receipt images and PDFs. The model identifies expense-relevant information in the document and returns structured data that PineBill uses to pre-fill the expense form.
The AI extracts:
| Field | Description |
|---|---|
| Title | A short name derived from the receipt or vendor name |
| Amount | The final total paid or payable |
| Currency | ISO 4217 currency code detected from the document |
| Date | Transaction date in the receipt |
| Category | Automatically classified into one of PineBill's expense categories |
| Vendor | Merchant or service provider name |
| Payment Method | Card, cash, bank transfer, or other method if visible |
| Notes | Additional context found in the document |
The AI also extracts line items, tax details, and totals from the receipt for your review.
Supported File Types
| Format | Extensions |
|---|---|
| Images | PNG, JPG, JPEG, WebP, GIF |
Maximum file size: 5MB.
Step-by-Step Guide
1. Open Extract from Receipt
Go to Expenses and click Extract from Receipt. A dialog opens with a drag-and-drop upload area.
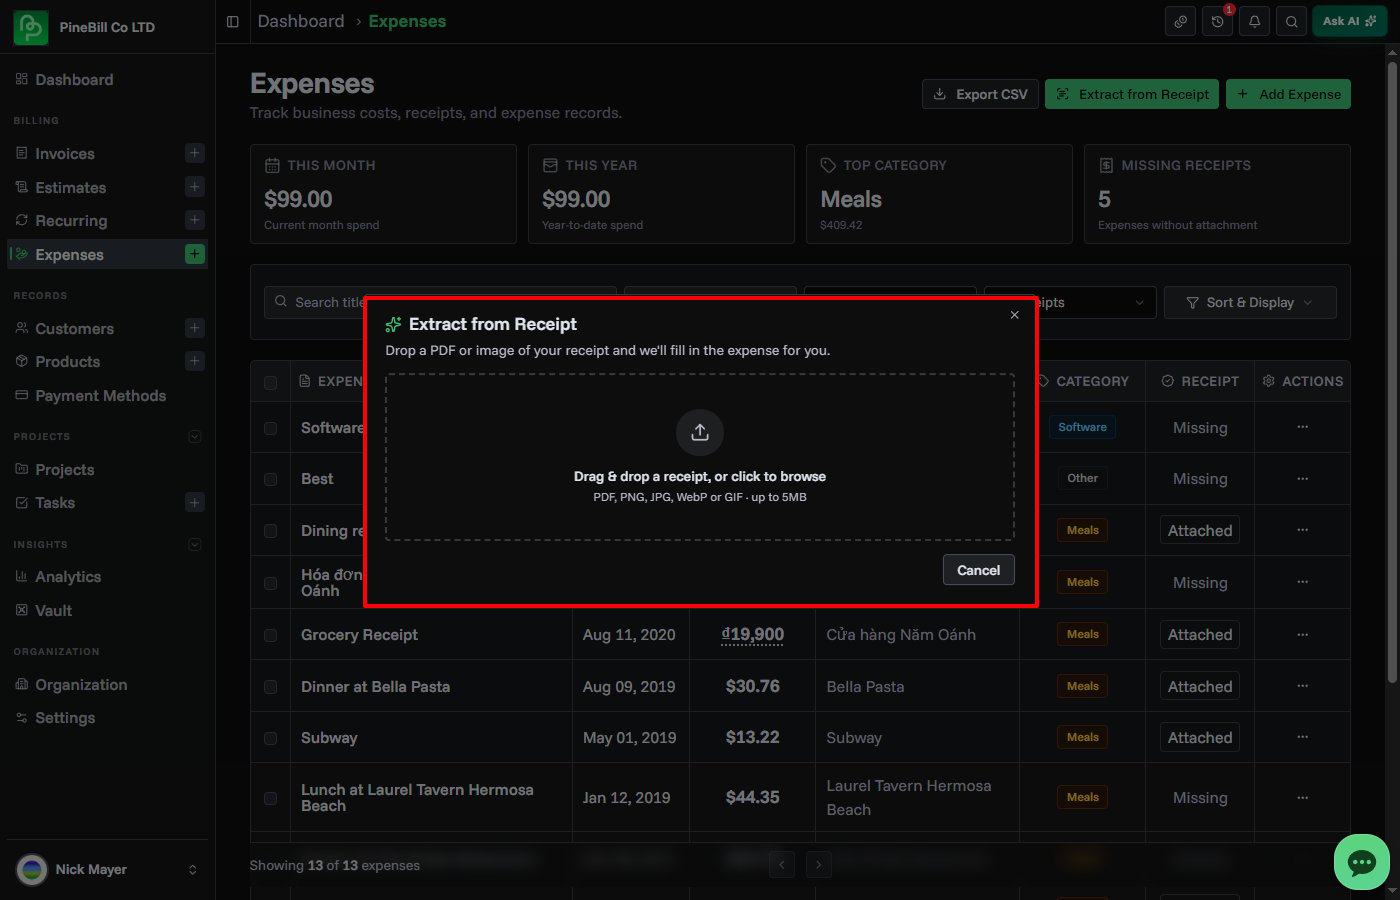
2. Upload Your Receipt
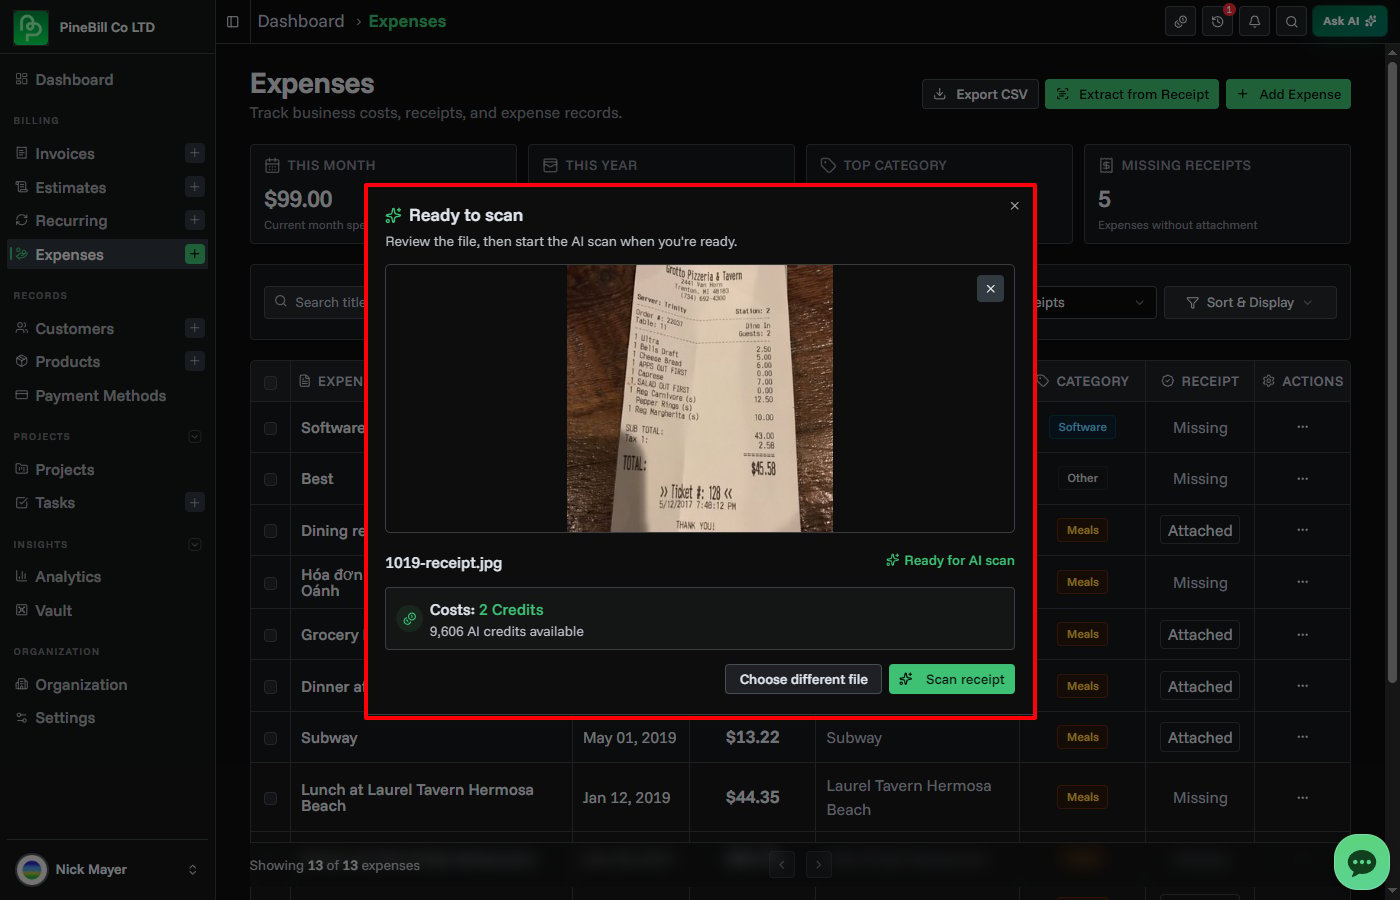
Drag a receipt file into the upload area, or click to browse your device. PineBill shows a preview of the uploaded file.
You can remove the file and choose a different one before scanning.
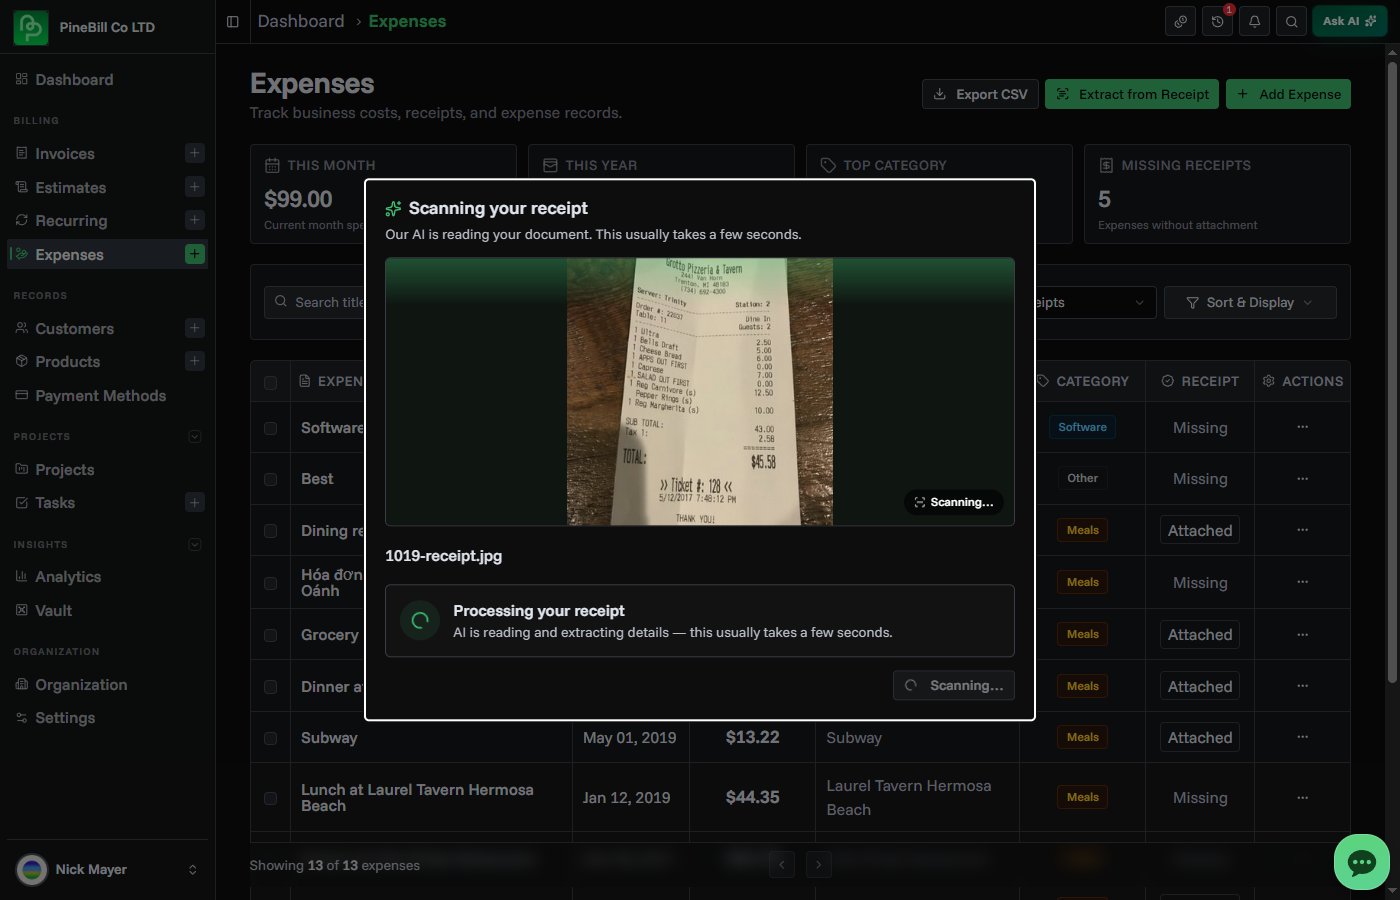
3. Scan the Receipt
Click Scan receipt to start the AI extraction. The dialog shows a scanning animation while the AI reads your document. This usually takes a few seconds.
The credit cost is displayed before you confirm the scan. If you don't have enough credits, the scan button is disabled.
4. Review Extracted Details
After a successful scan, PineBill opens the Add Expense form pre-filled with the extracted data. You can review and adjust any field before saving.
The form shows an extraction review with:
- Document type — what kind of document was detected (receipt, bill, purchase invoice, etc.)
- Confidence scores — how confident the AI is about each extracted field
- Warnings — any issues found during extraction, such as missing amounts or unclear text
5. Save the Expense
Review the pre-filled fields, make any corrections, and click Save Expense. The uploaded receipt is automatically attached to the expense.
Category Detection
The AI automatically classifies expenses into one of PineBill's categories based on the content of the receipt:
| Category | Examples |
|---|---|
| Software | SaaS subscriptions, hosting, domains, APIs, licenses |
| Office | Office supplies, stationery, coworking, rent |
| Travel | Flights, hotels, taxis, trains, fuel, parking |
| Meals | Restaurants, cafes, food, coffee, catering |
| Marketing | Ads, campaigns, design, branding, promotion |
| Equipment | Computers, phones, hardware, tools, furniture |
| Contractors | Freelancers, agencies, consultants |
| Taxes / Fees | Taxes, government fees, bank fees, accounting fees |
| Other | Anything that doesn't fit the above categories |
You can change the category after extraction if the AI classification doesn't match.
AI Credits
Each receipt scan costs 2.5 AI credits. Credits are deducted after the scan completes successfully. If the scan fails, no credits are charged.
Tips for Best Results
- Use clear, well-lit photos or high-resolution scans
- Make sure the entire receipt is visible in the image
- Avoid blurry, folded, or partially cropped receipts
- PDF receipts from digital purchases typically give the best results
- If extraction fails, try a different photo angle or a higher quality scan
Common Questions
Related Topics
- Creating Expenses - Add expense records manually
- Expense Management - Manage and review expenses
- AI Credits - Check balance and purchase credits