Customers
Adding New Customers
Step-by-step guide to adding new customers in PineBill.
Quick Start
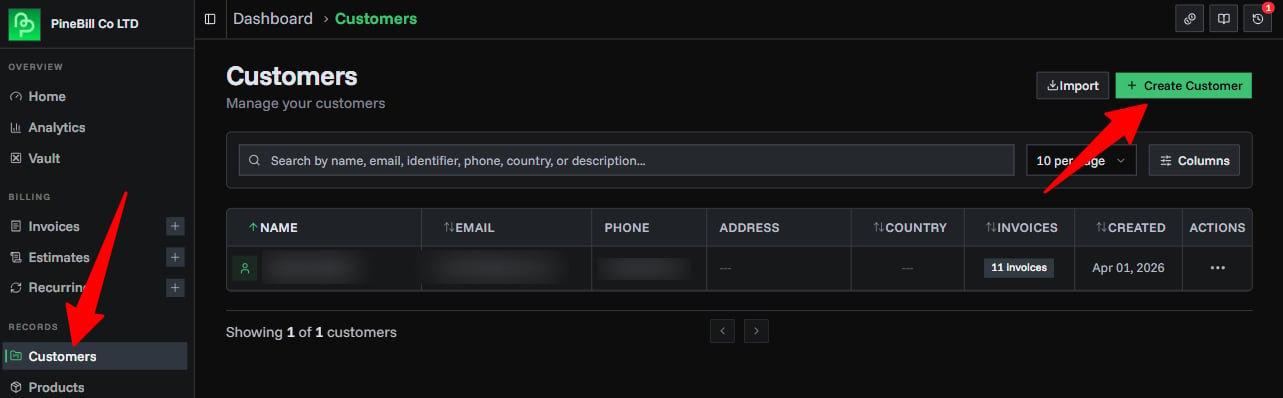
Adding customers to PineBill is straightforward. Navigate to the Customers page from your dashboard and click the Create Customer button to get started.
Customer Fields
| Field | Required | Description | Max Length | Notes |
|---|---|---|---|---|
| Customer Name | Yes | The full name or business name of your customer | 100 chars | - |
| Customer ID | Yes | A unique identifier for this customer (e.g., tax number, internal code) | 50 chars | Must be unique across your organization. Used to quickly find and reference the customer |
| Email Address | No | Customer's email for sending invoices and communications | - | Must be valid email format (e.g., customer@company.com) |
| Phone Number | No | Customer's contact phone number | 30 chars | Any format accepted - no specific format enforced |
| Address | No | Customer's billing or business address | 200 chars | Use the multi-line text area for complete addresses |
| ZIP Code | No | Customer's postal or ZIP code | 20 chars | - |
| Country | No | Customer's country | - | Must use ISO 3166-1 country names. Select from dropdown (e.g., "United States", "Germany") |
| Website | No | Customer's website URL | - | Must be a valid URL (e.g., https://example.com) |
| Tax ID / VAT | No | Customer's tax identification or VAT number | 50 chars | Any format accepted (e.g., US12-3456789, DE123456789) |
| Timezone | No | Customer's timezone in IANA format | - | Defaults to UTC. Examples: America/New_York, Europe/London. Dropdown shows timezone offsets |
| Description | No | Additional notes about the customer (e.g., payment terms, preferences, special requirements) | 500 chars | For internal use only |
Step-by-Step Guide
1. Access the Customer Creation Form
- Navigate to Dashboard → Customers
- Click the Create Customer button (top-right corner with plus icon)
- The "Create New Customer" dialog will open
2. Fill in Customer Details
Fill out the form with your customer's information:
Name: Acme Corporation *
Customer ID: ACME-001 *
Email Address: billing@acme.com
Phone Number: +1 (555) 123-4567
ZIP Code: 10001
Country: United States
Website: https://acme.com
Tax ID / VAT: US12-3456789
Timezone: America/New_York
Address: 123 Main Street
         Suite 100
         New York, NY
Description: Premium customer - Net 30 payment terms
Fields marked with * are required.
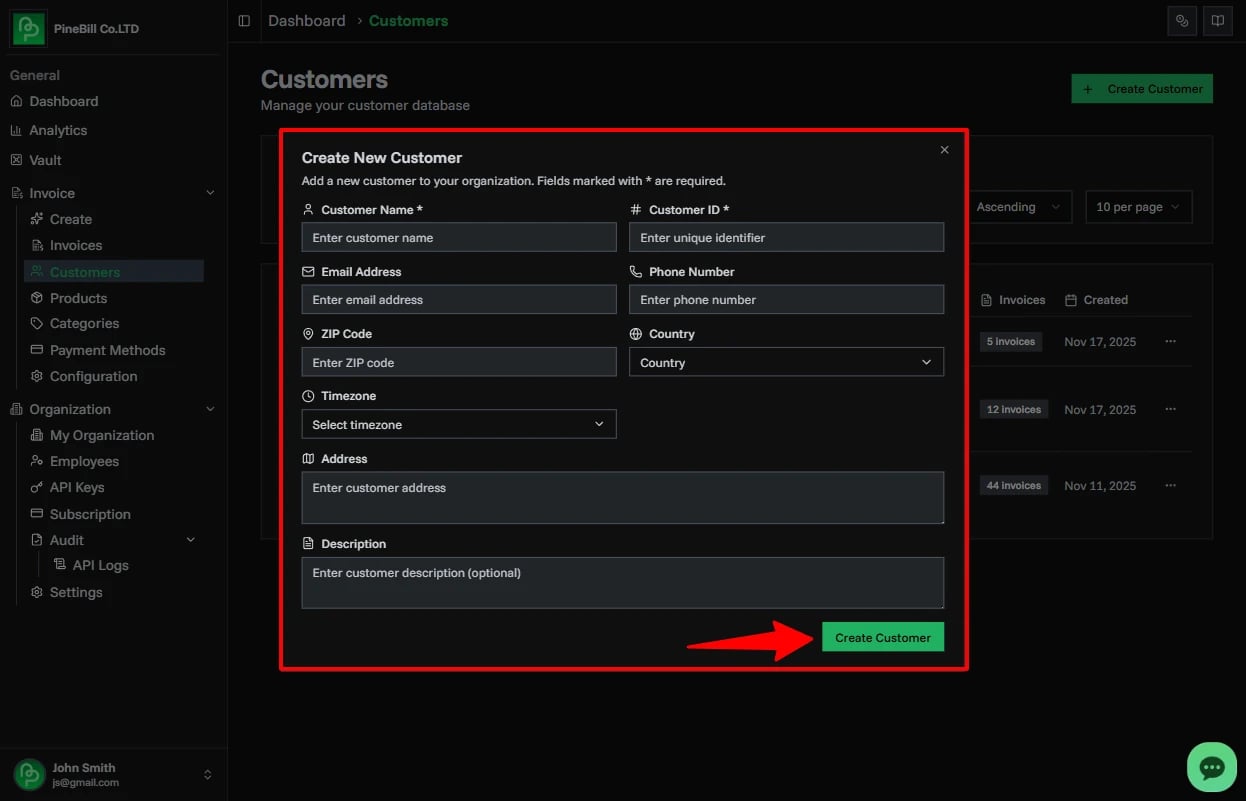
3. Review and Submit
- Double-check that the Customer ID is correct (it must be unique)
- Verify the email address is accurate for invoice delivery
- Click Create Customer to save
- You'll see a success notification when the customer is created
After Creating a Customer
Once a customer is created, you can:
- View Customer Details: Click on any customer in the list to see full information
- Edit Customer: Update customer details anytime by clicking the edit button
- Search and Filter: Find customers quickly using the search bar
Additional Notes
- Customers are scoped to your organization - team members can access all organization customers
- You cannot delete customers who have existing invoices (to maintain data integrity)
- Only organization owners have permission to delete customers