Estimate Sharing
Share your estimates securely with clients and team members.
How To Share Your Estimates
Share your estimates with clients, vendors, or team members using secure links or email. You can create multiple share links for each estimate with different settings, or send estimates directly via email with PDF attachments.
Sending Estimates via Email
Send your estimates directly to customers via email with professional templates and PDF attachments.
How to Send an Estimate by Email
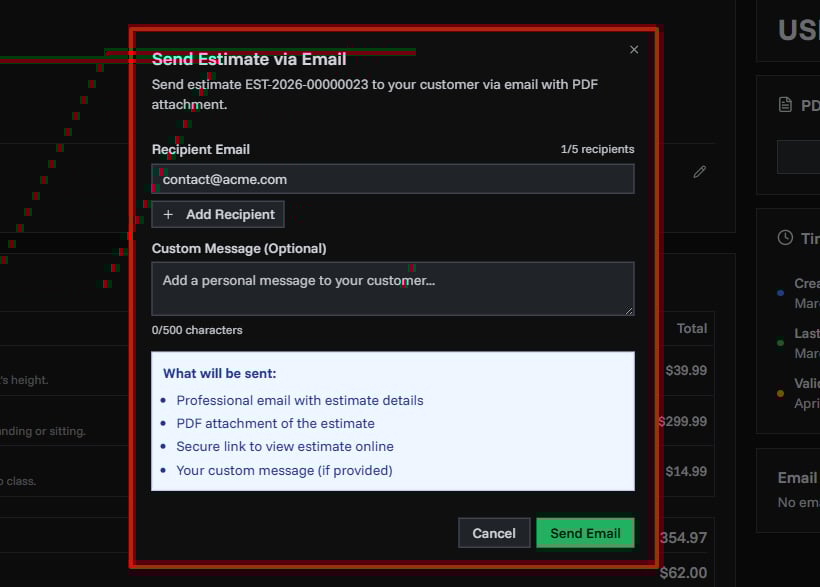
- Open the estimate you want to send
- Click the Send via Email button at the top right
- Enter recipient email addresses (up to 5 recipients)
- Add a custom message (optional, up to 500 characters)
- Click Send Email
What Your Customer Receives
When you send an estimate via email, your customer gets:
- Professional email with your company name and estimate details
- PDF attachment of the complete estimate
- Secure link to view the estimate online
- Your custom message (if you added one)
- Estimate number, amount, and validity date clearly displayed
Email Tracking
Track engagement with your sent estimates:
- See when emails were sent and by whom
- Track how many times the "View Estimate" link was clicked
- View the last time the link was accessed
- Monitor all email activity in the Email History section
- Receive notifications when customers accept or deny the estimate
Email History
View the complete email history for each estimate:
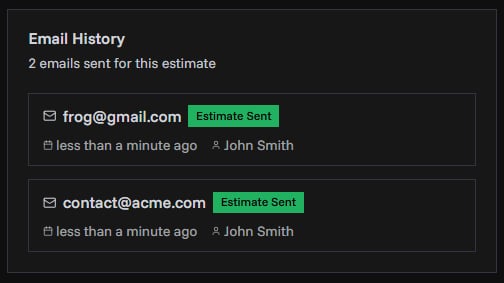
- Open your estimate
- Scroll to the Email History section
- See all sent emails with details including:
- Recipient email address
- When it was sent
- Who sent it
- Click tracking statistics
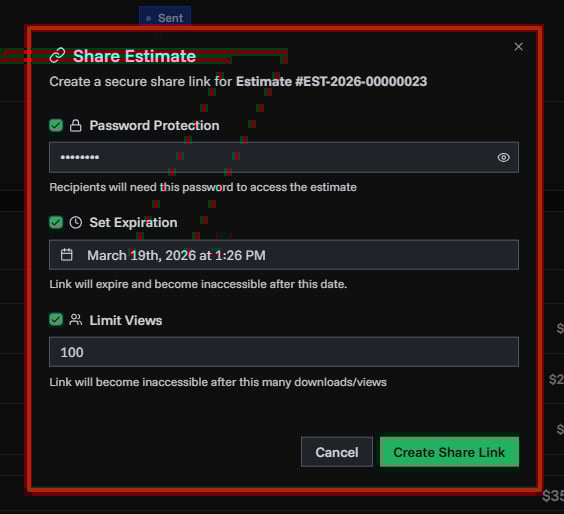
Sharing via Secure Links
Create shareable links for your estimates with customizable security options.
How to Share an Estimate
- Open the estimate you want to share
- Click the Share PDF button at the top right
- Choose your security settings
- Click Create Share Link
- Copy and share the link
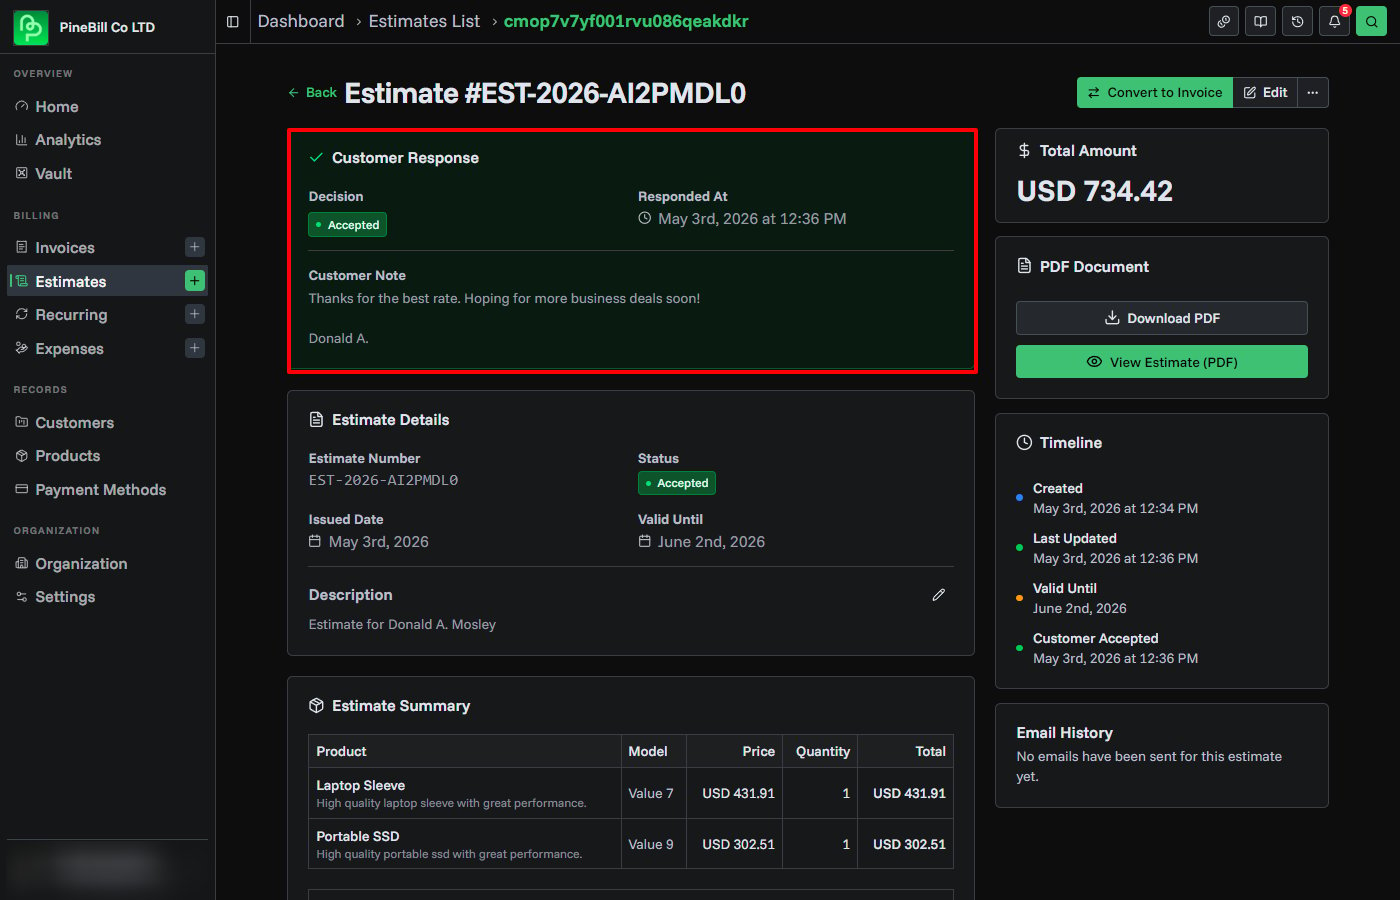
Customer Approval Responses
Customers can respond directly from the shared estimate page after opening the secure link. They can accept or deny the estimate and add an optional note for context.
What Customers Can Do
- Accept the estimate when they approve the pricing and terms
- Deny the estimate when they do not want to proceed
- Add a note to explain their decision or provide next steps
- Download the PDF if they have access to the share
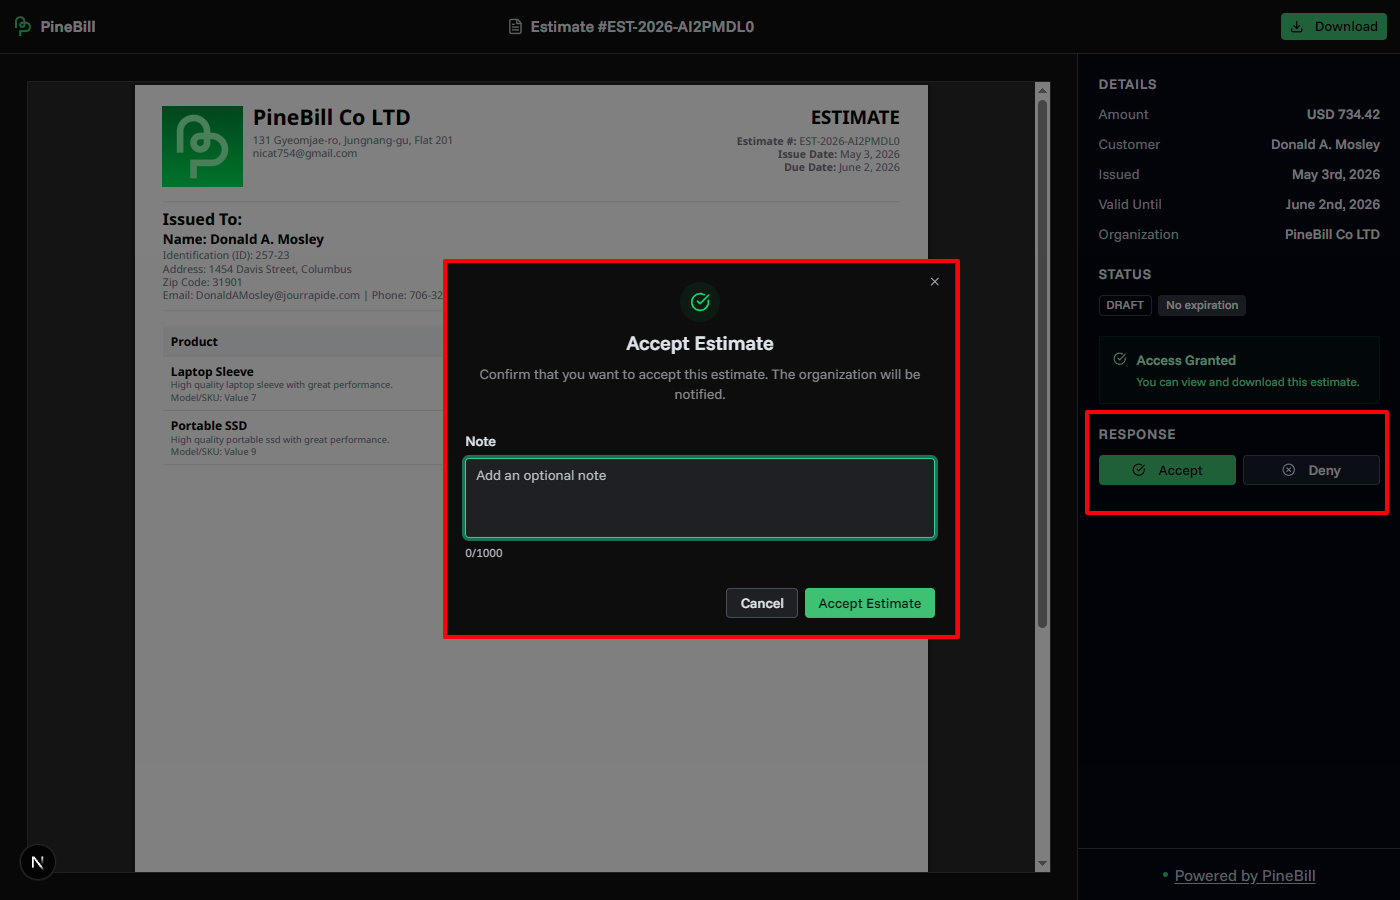
What Your Team Sees
When a customer submits a response:
- The estimate status changes to Accepted or Declined
- Organization members receive an email and dashboard notification
- The estimate detail page shows the response, timestamp, and customer note
- Accepted estimates can be converted into invoices from the estimate detail page
Security Options
Password Protection
Add a password to protect your estimate from unauthorized access.
How to use:
- Check the Password Protection box
- Enter a password (at least 4 characters)
- Click the eye icon to show/hide your password
- Share the password separately from the link (by phone, text, or separate email)
Expiration Date
Make your share link expire automatically after a certain time.
Quick options:
- 1 hour - For immediate review
- 1 day - Short-term access
- 1 week - Standard estimate delivery
If you don't set an expiration, the link will work forever and it will be a public link. You'll see a yellow warning when creating a permanent link. Once you created a permanent link, you cannot add expiring links to the same estimate later.
View Limit
Limit how many times people can view your estimate.
When to use:
- Controlling who can access the estimate
- Tracking how many times it's been viewed
- Preventing unlimited sharing
How to use:
- Check the Limit Views box
- Enter the maximum number of views (1 to 10,000)
- The link stops working once it reaches this limit
Managing Your Shares
View and manage all your share links in one place.
View All Shares
- Open your estimate
- Click the Manage Shares button at the top right
- See all your active and inactive shares
Understanding Share Status
Each share shows its current status:
- Active - Link is working
- Expired - Past the expiration date
- View Limit Reached - Maximum views used up
- Revoked - Manually disabled
You'll also see:
- Public badge - No expiration (permanent link)
- Protected badge - Password required
What You Can See
For each share link:
- Who created it and when
- Expiration date (or "Never")
- How many times it's been viewed
- When it was last viewed
- The share URL (for active links)
Copy a Share Link
- Find the share you want to copy
- Click the copy icon next to the URL
- You'll see a confirmation message
- Paste and share the link
Delete a Share Link
Organization owners can delete any share link:
- Click the Manage Shares button
- Find the share you want to delete
- Click the trash icon
- Confirm deletion
Once deleted, the link stops working immediately and can't be restored.
Quick Reference
Email Features
| Feature | What it does | Limit |
|---|---|---|
| Recipients | Send to multiple email addresses | Up to 5 per send |
| Custom Message | Personal message in email | 500 characters |
| PDF Attachment | Estimate PDF attached to email | Included |
| Email Tracking | Track link clicks and engagement | Unlimited tracking |
| Email History | View all sent emails for estimate | Complete history |
| Response Alerts | Notify team when customer responds | Organization members |
Secure Link Features
| Feature | What it does | Maximum |
|---|---|---|
| Password | Requires password to view | 4 characters minimum |
| Expiration | Link stops working after date | 7 days from now |
| View Limit | Maximum number of views | 10,000 views |
| Shares per Estimate | How many links you can create | Unlimited |
| Customer Response | Accept or deny from share page | One response |
Troubleshooting
Only organization owners can delete share links. Emails can be sent by any team member with access to the estimate.